
First let me say that I got this idea from this group and this post was specifically my source for both process and supplies:
https://www.reddit.com/r/RedditLaqueristas/s/6rWpP53ibA
Truly, start there. It is an awesome post!
For my products…
Paper Tape – 3M Scotch Performance Paper Box… https://www.amazon.com/dp/B00BJ5GSMY?ref=ppx\_pop\_mob\_ap\_share
25mm Glass Cabochons – Gwybkq 150 Glass Dome Cabochons,… https://www.amazon.com/dp/B08J3VKV4M?ref=ppx\_pop\_mob\_ap\_share
Adhesive Magnets – Magnets for Crafts with Adhesive… https://www.amazon.com/dp/B0CCJGFNPC?ref=ppx\_pop\_mob\_ap\_share
Fine tip chalk markers – ARTISTRO 5
White Paint Pen for… https://www.amazon.com/dp/B07D2LC8LH?ref=ppx\_pop\_mob\_ap\_share
Magnet stands – 3 Pcs Magnet Stand for 3D… https://www.amazon.com/dp/B0BFCSLWZG?ref=ppx\_pop\_mob\_ap\_share
Magnetic White Board – 18×24 – from an office supply store (don’t remember which one)
White Nail Polish – Essie White on Time
Neodymium Bar Magnets – LOVIMAG Strong Neodymium Bar… https://www.amazon.com/dp/B09TKQDKX7?ref=ppx\_pop\_mob\_ap\_share
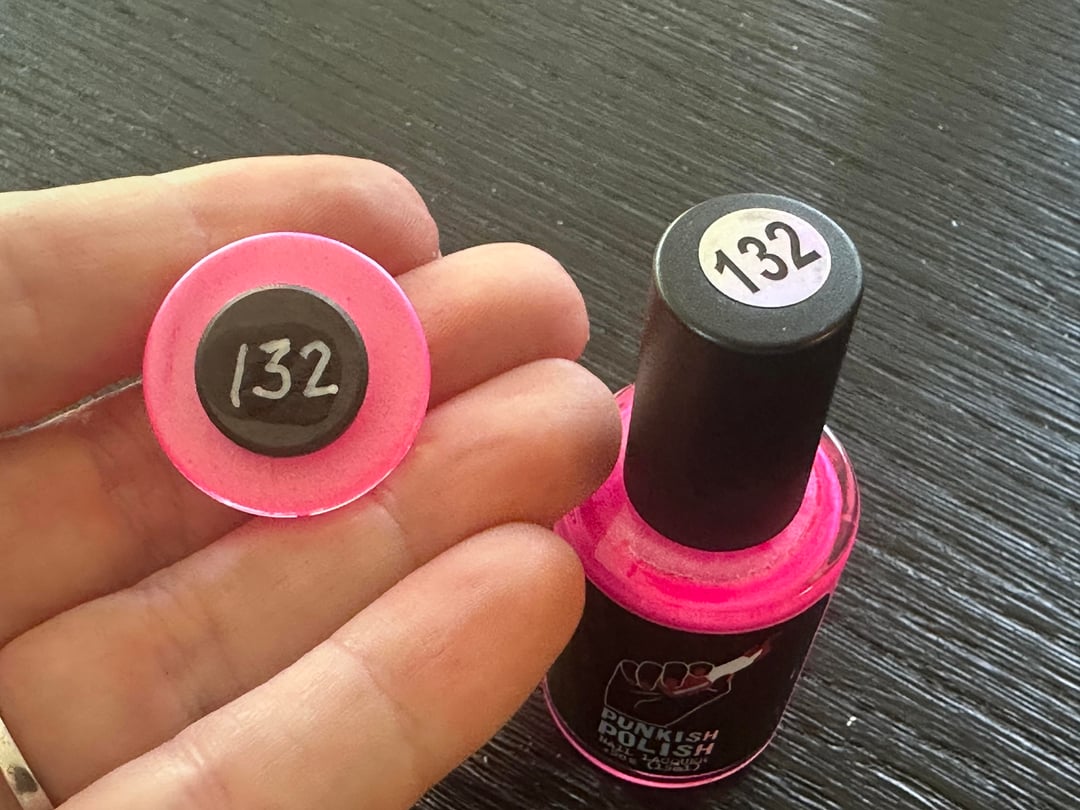
QDTC – Sally Hansen Red Bottle
Number stickers – 2 Sets Number Stickers (Number… https://www.amazon.com/dp/B09ZV3DVCC?ref=ppx\_pop\_mob\_ap\_share
For my process…
Painting the cabochons (Photo 2):
– Roll out a workable amount of tape sticky-side-up and place your cabochons curved side down. Do as many coats as you wish (I did 3) and wait for them to dry.
– IMPORTANT TIP – because you will be placing a magnet on the back, so you will want all your magnetics to be fully cured. This is a slow project.
– You should decide here how you want your cabochons to look and what purpose you want them to serve. I wanted my cabochons to be “swatch like” meaning I wanted to see exactly how sheer each polish is on its own. (This created more work for me in the next step.)
– If you do not want your cabochons to be sheer, you will need to add additional layers of white/black/nude/whatever here and let that fully dry as well.
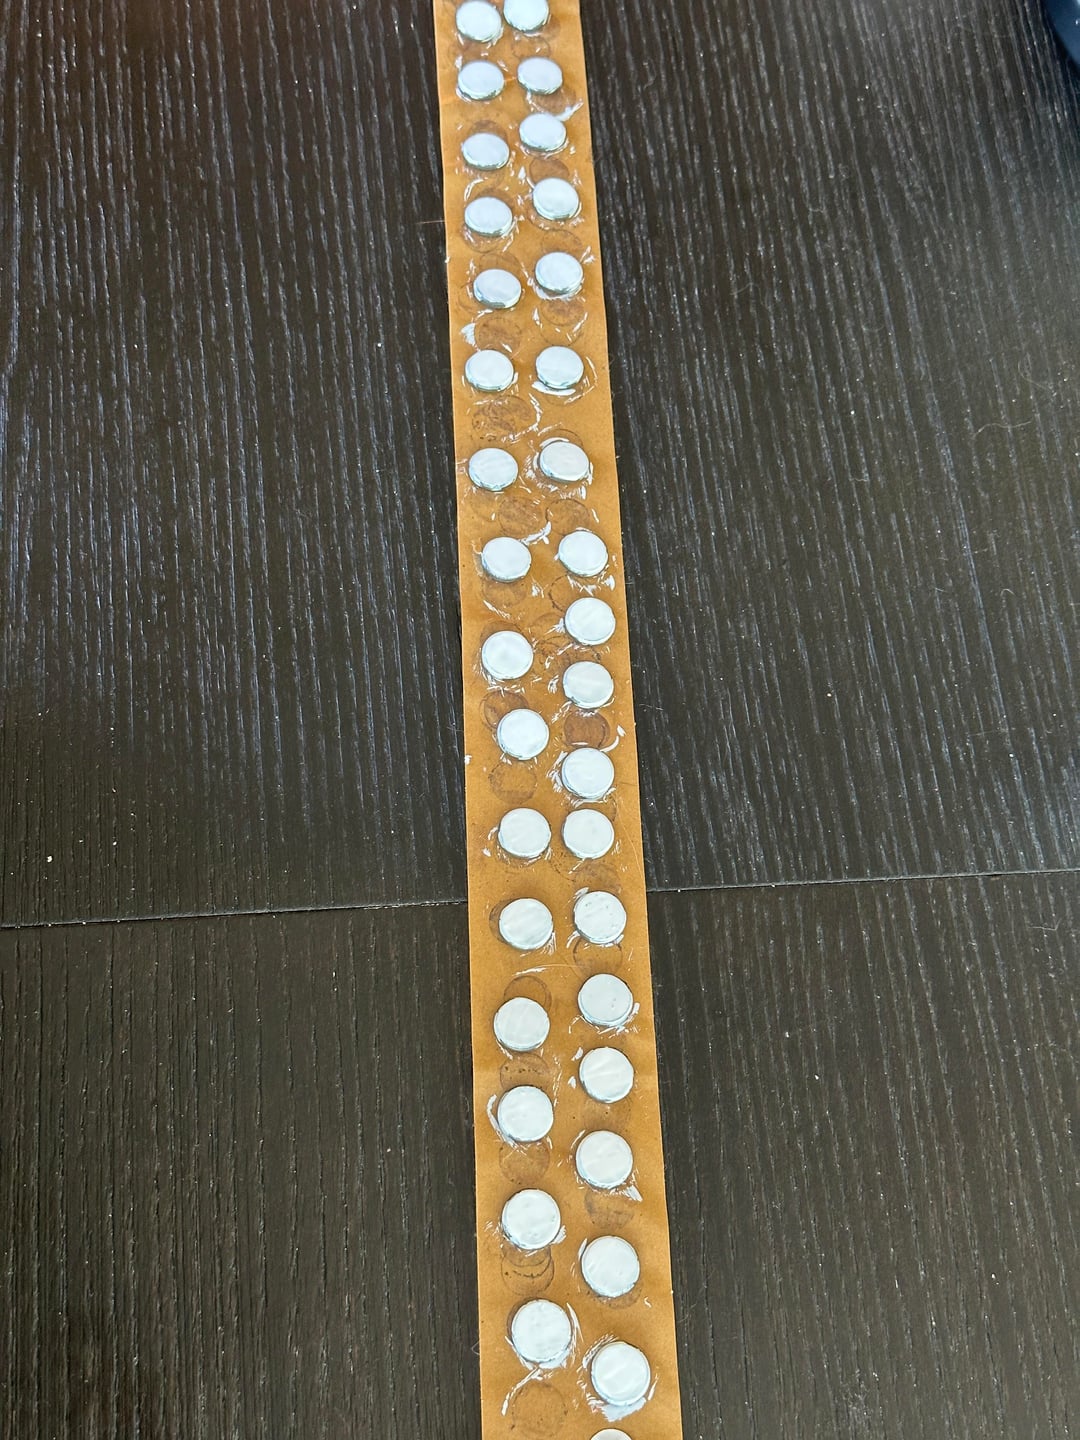
Prep the magnets (Photo 3):
– If your cabochons are fully opaque, stick the magnets on the back of your dried cabochons and be thankful you went that route.
– While I wanted my cabochons to reflect the polish’s actual sheerness, I did not want black magnets being so visible between the cabochons and the white board. So I hand painted one side of all the magnets white. I don’t know why this part felt so tedious and never ending to me. In hindsight I would have laid them all out on a much larger surface and rolled over them with a foam roller and some craft paint. Instead I hand painted each one with white nail polish. (3 coats to fully cover the black.) Once that fully dries, stick to the cabochons.
– If you keep your cabochons sheer, consider what you are sticking them on when you are done. If you have one of the beautiful Bisley colors, I wouldn’t choose white in that case – the white would stand out far too much between your polish and your Bisley.
– I don’t regret going the sheer route – it helps me use these as better representation for what the polish is in its standalone state. But it did create more work and takes away from some of the visual appeal. The white certainly helps camouflage the magnets from a distance, but you can definitely still see the magnets on my sheer polishes. (Photo 4)
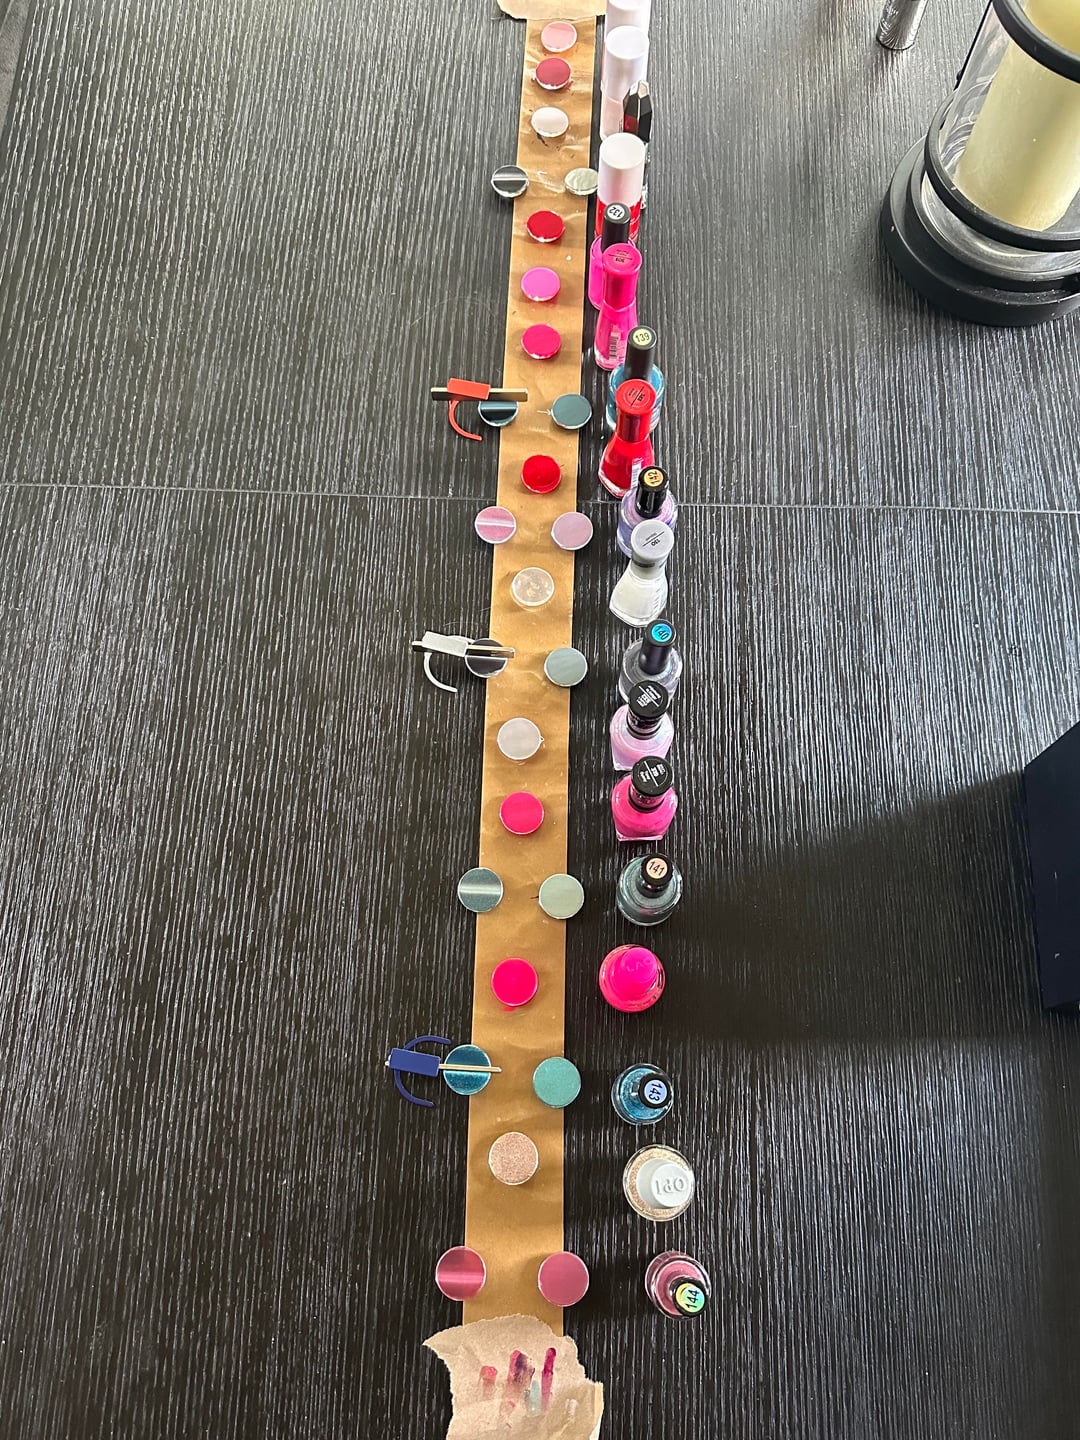
Label the cabochons
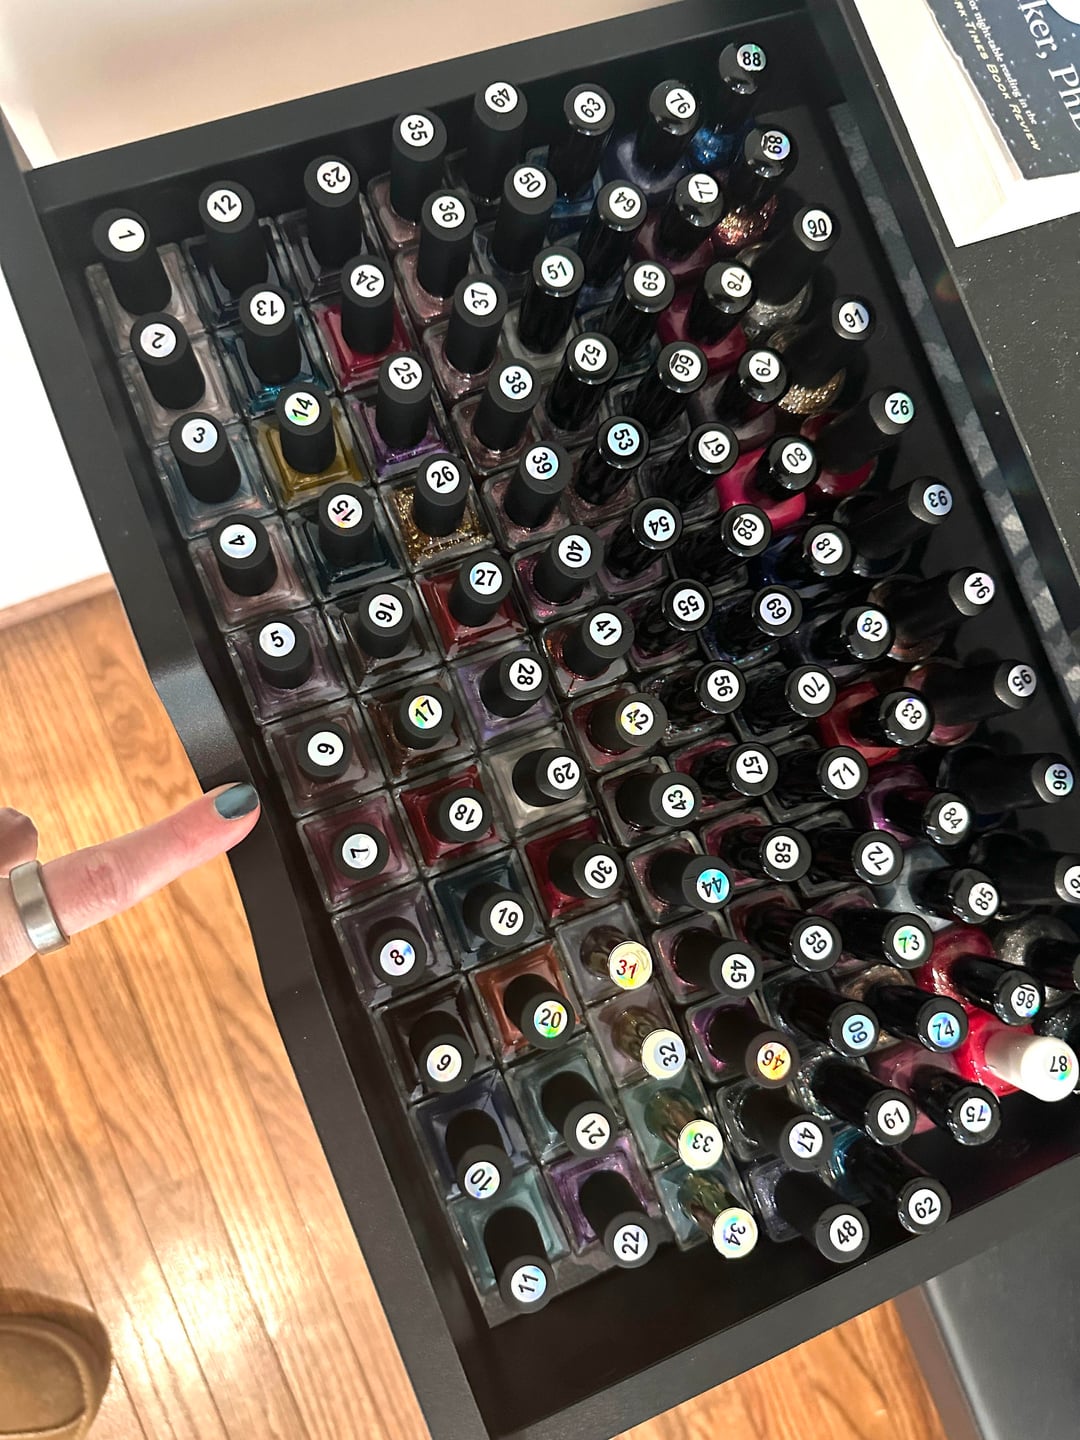
– I already had my polishes identified and swatched by number which made this infinitely easier. (Photo 5)
– Important if you are using the chalk markers I used – after the chalk marker dries, put a layer of QDTC over it to prevent it from smudging/fading over time. Let that dry fully as well. (Photo 6)
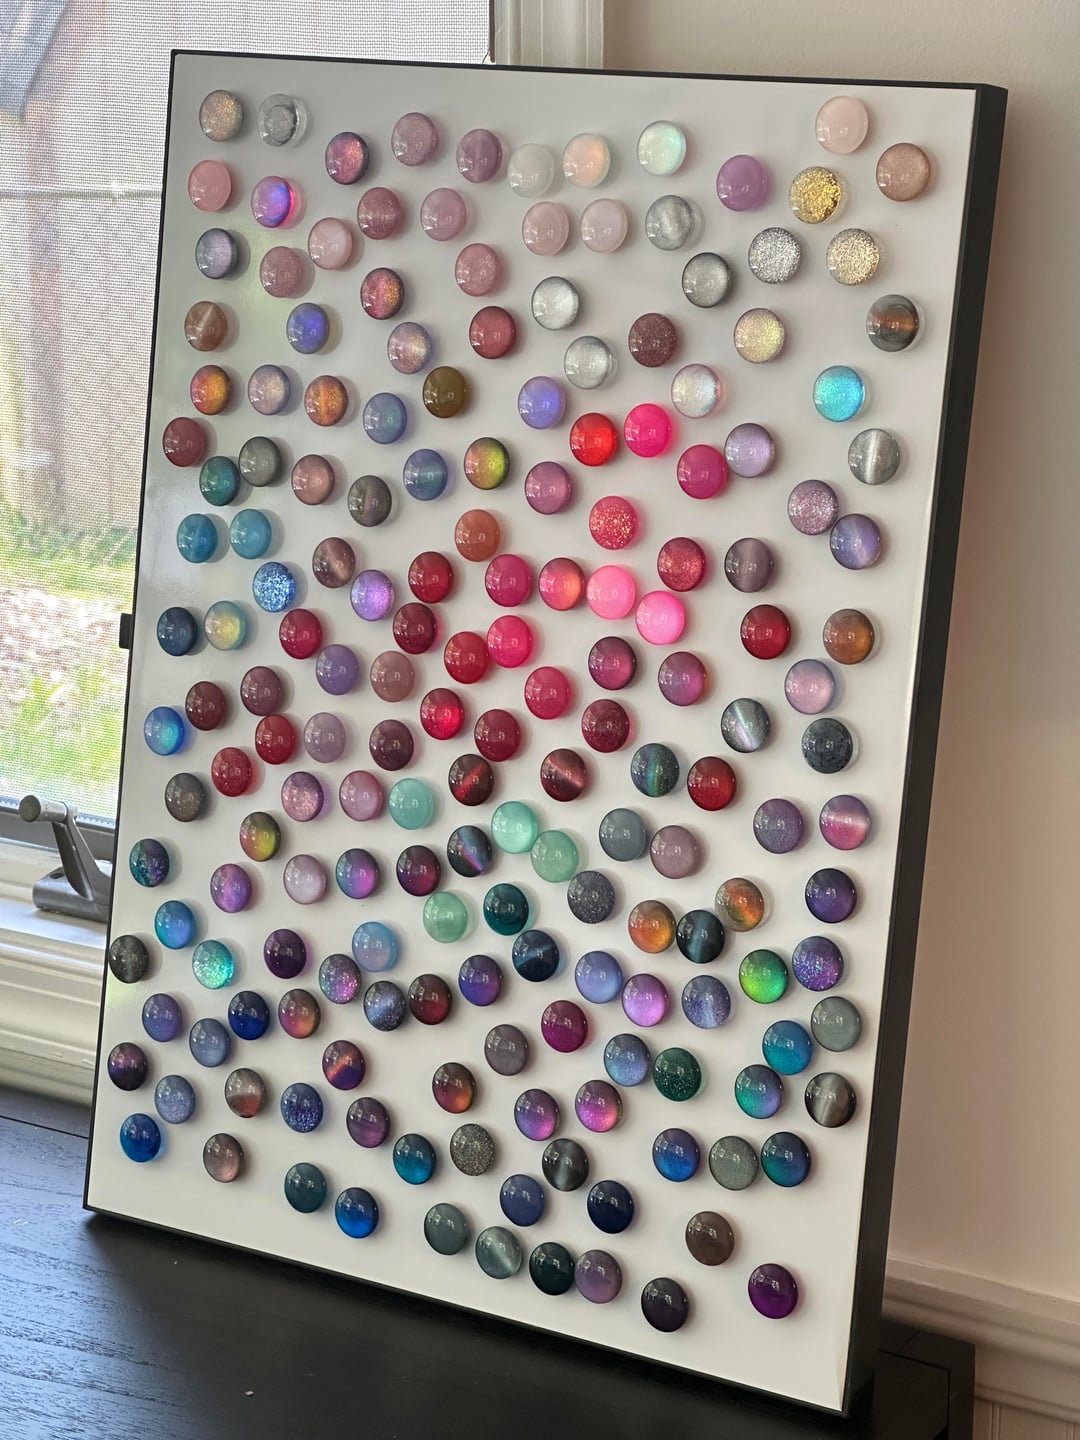
VIOLA!
Admire your polishes. Arrange them either artistically or functionally. I can’t decide if I want to make mine into a rainbow waterfall or if I want to sort it into groups of favorites, never worn, destash, etc.
One thing is for sure though – I do think it will help me stop duping myself and falling for FOMO to be able see every single polish I have right in front of me at once. (And I’ve committed to myself that I’m not outgrowing this board.)
by Brave-Elevator-6609
2 Comments
That looks so cool and thank you for describing the process!
I have already cabochons+ magnets at home because I wanted to also swatch my polishes on them and simply need the time to start with that similar project, so its good to read about your experience 🙂
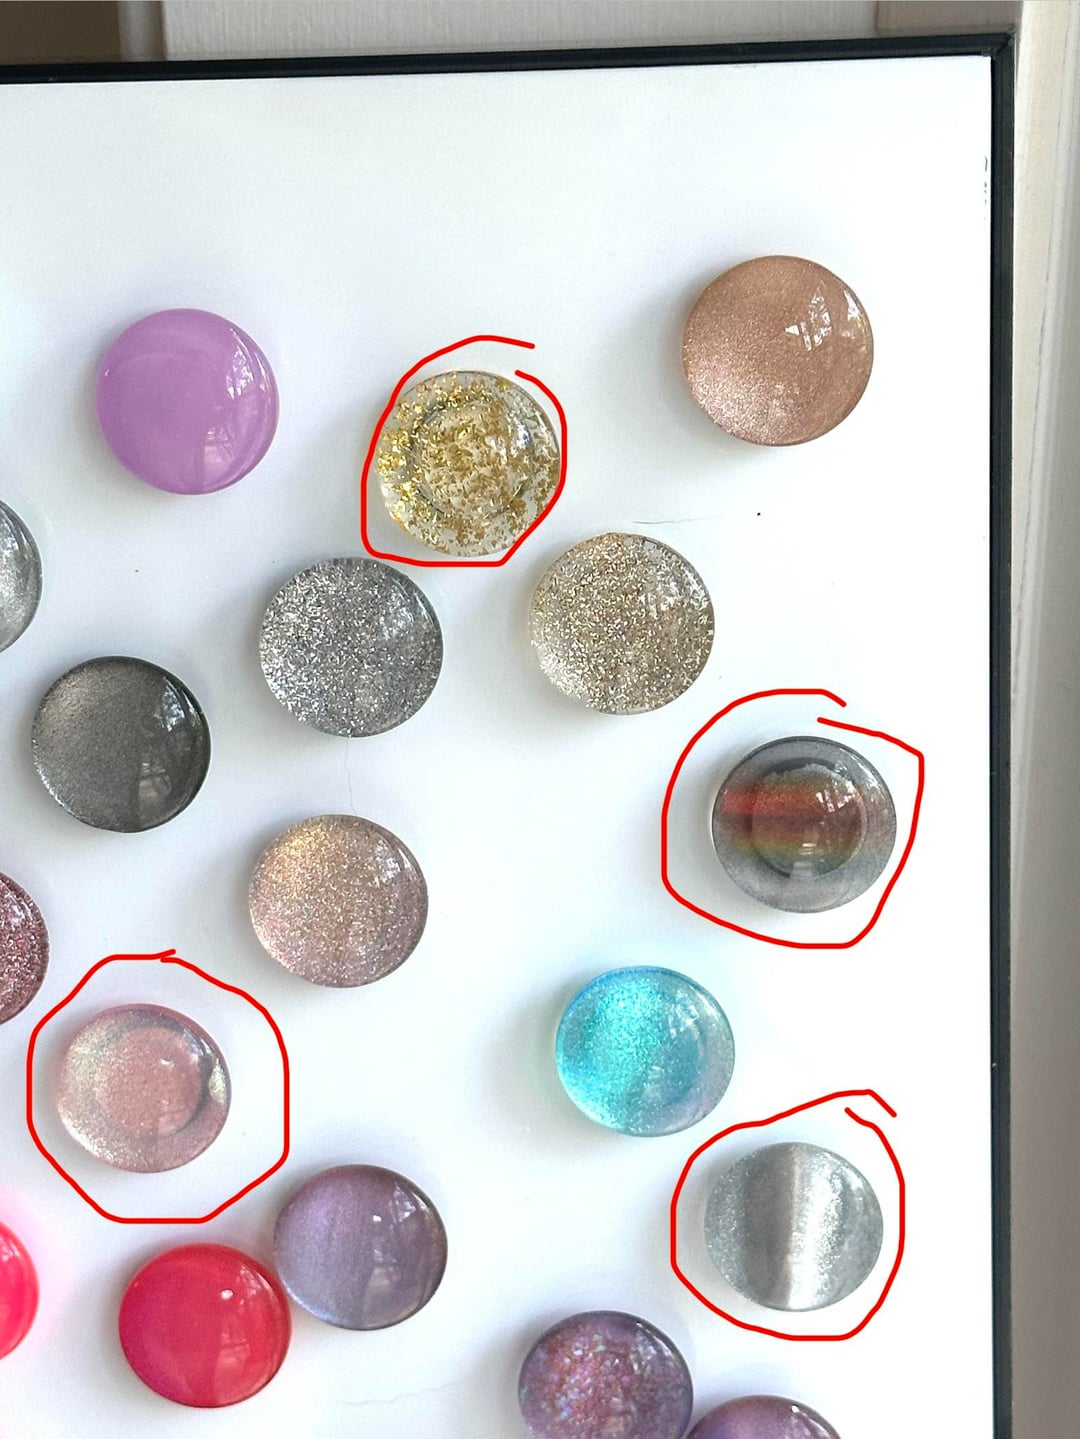
Amazing organizational skills! And so gorgeous to look at! Can you please tell me the names+shades circled (adding photo to this comment) and especially the one in the middle, circled in black?
https://preview.redd.it/zsa4839xrzwg1.jpeg?width=1206&format=pjpg&auto=webp&s=cae31a74847dc598d42f4dc496a18e2eb681c086